


In today’s digital age, protecting your online privacy has never been more important. While installing a VPN app on your phone or computer works well, setting up a VPN on your router ensures that every device connected to your home network is automatically protected. From smart TVs to gaming consoles, all internet traffic will be encrypted without needing to install separate apps. Here’s a step-by-step guide to help you set up a VPN on your router.
Why Use a VPN on Your Router?
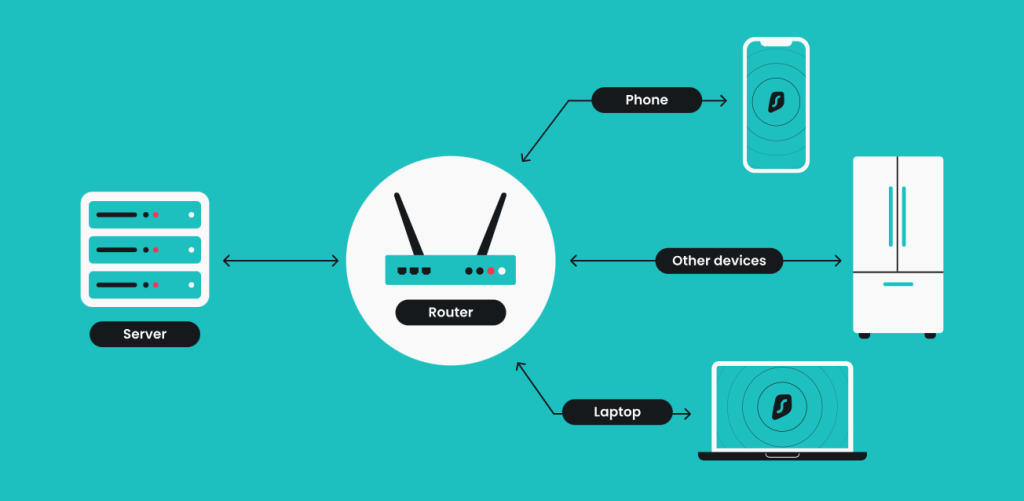
By configuring a VPN directly on your router, you gain continuous protection for all devices in your household. This setup is particularly useful for devices that don’t support VPN apps, such as streaming sticks or IoT devices. Plus, you won’t have to connect each device to the VPN manually; it all happens automatically.
Protect your entire network with just one setup.
Step 1: Check Router Compatibility
Not all routers support VPN functionality. Check your router’s manual or manufacturer’s website to confirm whether it supports VPN setup. In many cases, high-end or third-party firmware like DD-WRT or OpenWRT is required.
Confirm your router’s VPN support before getting started.
Step 2: Choose a Reliable VPN Service
Select a VPN provider that offers router support. Popular services like ExpressVPN, NordVPN, or Surfshark often provide detailed setup guides and configuration files specifically for routers.
Pick a VPN service that balances speed, security, and ease of use.
Step 3: Access Your Router Settings
Log in to your router by entering its IP address (usually something like 192.168.1.1) into your web browser. From there, you’ll need your admin username and password, which can usually be found on the back of the router or in the user manual.
Secure your login details before making changes to your router.
Step 4: Enter VPN Configuration Details
Most VPN providers will give you a configuration file or manual instructions. You’ll need to copy settings such as the VPN server address, your username, and your password into the router’s VPN section. In some cases, you may also upload an. ovpn configuration file provided by your VPN service.
Follow your VPN provider’s step-by-step instructions carefully.
Step 5: Test Your VPN Connection
Once configured, save the changes and restart your router. Connect a device to your Wi-Fi network and check your IP address using an online tool. If the VPN is working correctly, your IP should reflect the VPN server’s location instead of your real one.
Always test your VPN connection to confirm it’s active.
Advanced Tips for Better VPN Performance
While using a VPN on your router enhances security, it can sometimes slow down your internet speed due to encryption. To optimize performance, connect to VPN servers closer to your location, use a router with stronger processing power, or choose VPN protocols like WireGuard for faster speeds. You can even set up split tunneling on some routers, allowing certain devices to use the VPN while others connect directly to the internet.
Maximize speed and flexibility with smart VPN settings.
Final Thoughts
Setting up a VPN on your router may seem complicated at first, but it’s one of the best ways to ensure all your devices remain secure and private online. Once installed, you’ll never need to worry about turning on a VPN for each device again. With just a single setup, your entire household gains the benefits of encrypted browsing, streaming access, and better online security.